 |
|||
|
|
|||
|
Page Title:
Table 2-39. Front Output Shaft Sprag Unit Wear Limits |
|
||
| ||||||||||
|
|
 TM 9-2520-246-34-1
FRAME 2
NOTE
Readings must be within limits given in table 2-39. If
readings are not within given limits, throw away part
and get a new one.
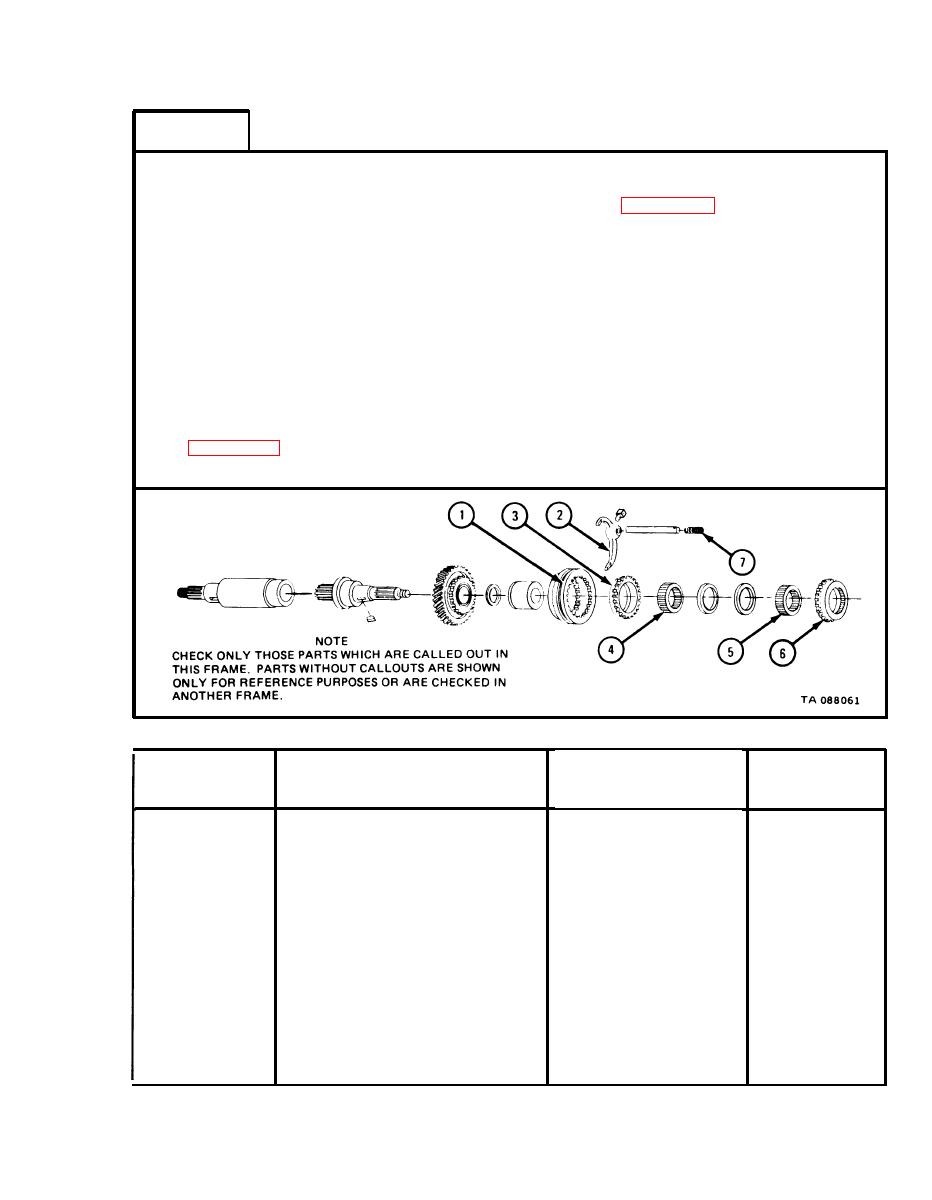
Measure reverse shift collar groove width (l).
1.
Measure reverse shift shaft fork thickness (2).
2.
Measure rear outer race inside diameter (3).
3.
Measure rear sprag unit width (4).
4.
Measure front sprag unit width (5).
5.
Measure front outer race inside diameter (6).
6.
Measure free length of spring (7) and spring length at pressures given in
7.
GO TO FRAME 3
Table 2-39.
Front Output Shaft Sprag Unit Wear Limits
Size and Fit
of New Parts
Wear Limit
(inches)
(inches)
Item/Point of Measurement
Index Number
0.6060 to 0.6100
Shift collar groove width
1
0.6180
Shift shaft fork thickness
2
0.5590
0.5705 to 0.5665
Rear race inside diameter
3
3.8378
3.8338 to 3.8348
Rear sprag unit width
4
0.3770 to 0.3780
0.3750
Front sprag unit width
5
0.3770 to 0.3780
0.3750
Front race inside diameter
6
3.8338 to 3.8348
3.8378
7
Spring free length
2.290 to 2.440
None
Spring length at pressure
7
2 3/32 at 12 to
None
18 pounds
1 l/2 at 41 to
None
44 pounds
2-199
|
|
Privacy Statement - Press Release - Copyright Information. - Contact Us |