 |
|||
|
|
|||
|
Page Title:
Table 2-23. Input Shaft and Gears Wear Limits |
|
||
| ||||||||||
|
|
 TM 9-2520-246-34-1
FRAME 2
NOTE
Readings must be within limits given in table 2-23. If
readings are not within given limits, throw away part
and get a new one.
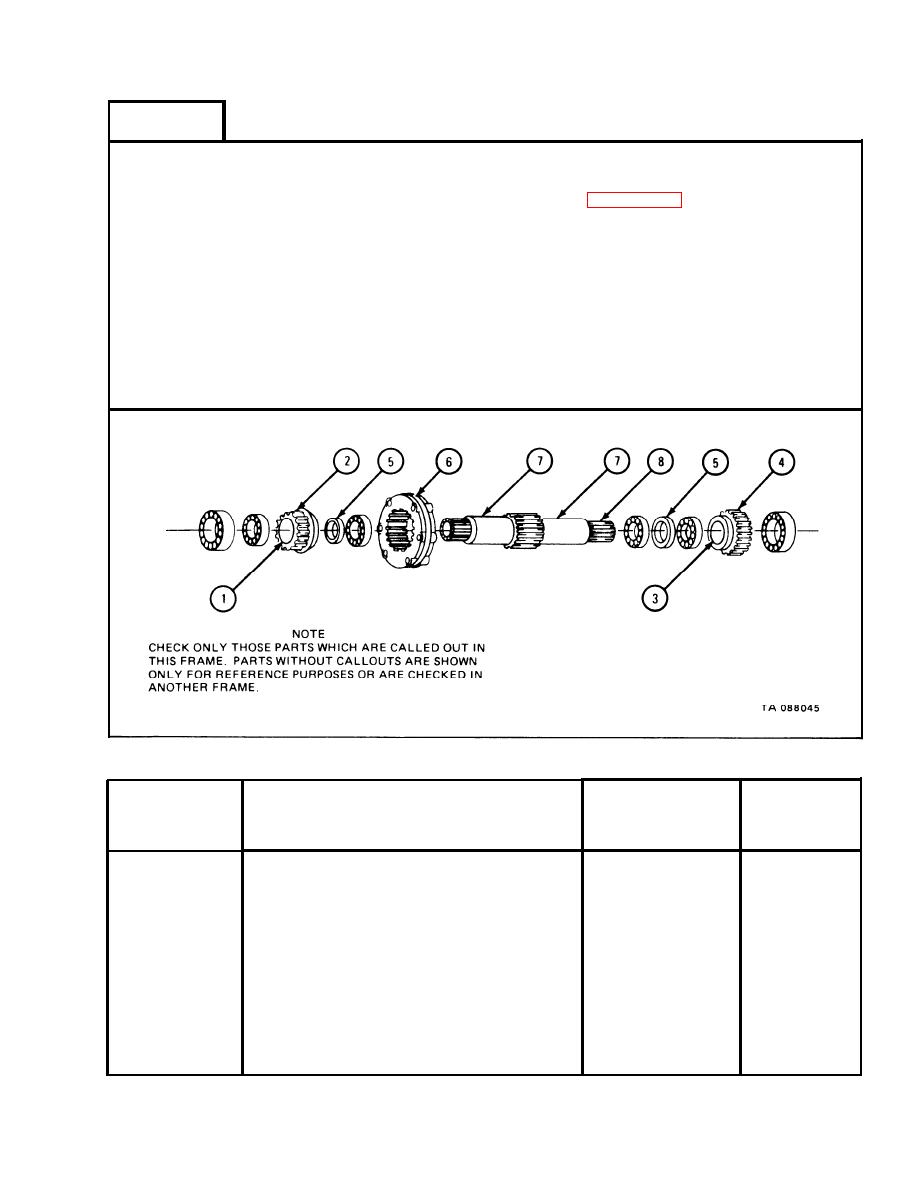
Measure low range gear bore (1) and low range gear outside diameter (2).
1.
Measure high range gear bore (3) and high range gear outside diameter (4).
2.
Measure inside diameter of two spacer sleeves (5).
3.
Measure clutch ring width (6).
4.
Measure input shaft diameter (7) in two places and bearing surface diameter (8)
5.
GO TO FRAME 3
Table 2-23.
Input Shaft and Gears Wear Limits
Size and Fit
of New Parts
Wear Limit
Item/Point of Measurement
Index Number
(inches)
(inches)
Low range input gear bore
1
3.5425 to 2.5434
3.5439
2
Low range input gear outside diameter 5.3255 to 5.3265
None
High range gear bore
3
3.5425 to 3.5434
3.5439
High range gear outside diameter
4
6.895 to 6.900
None
Spacer sleeve inside diameter
5
1.979 to 1.989
None
6
Clutch ring width
0.682 to 0.687
0.6600
7
Input shaft diameter
1.9682 to 1.9687
None
Bearing surface diameter
8
1.7716 to 1.7721
1.7716
2-183
|
|
Privacy Statement - Press Release - Copyright Information. - Contact Us |