 |
|||
|
|
|||
|
|
|||
| ||||||||||
|
|
 TM 9-2320-366-20-3
NOTE
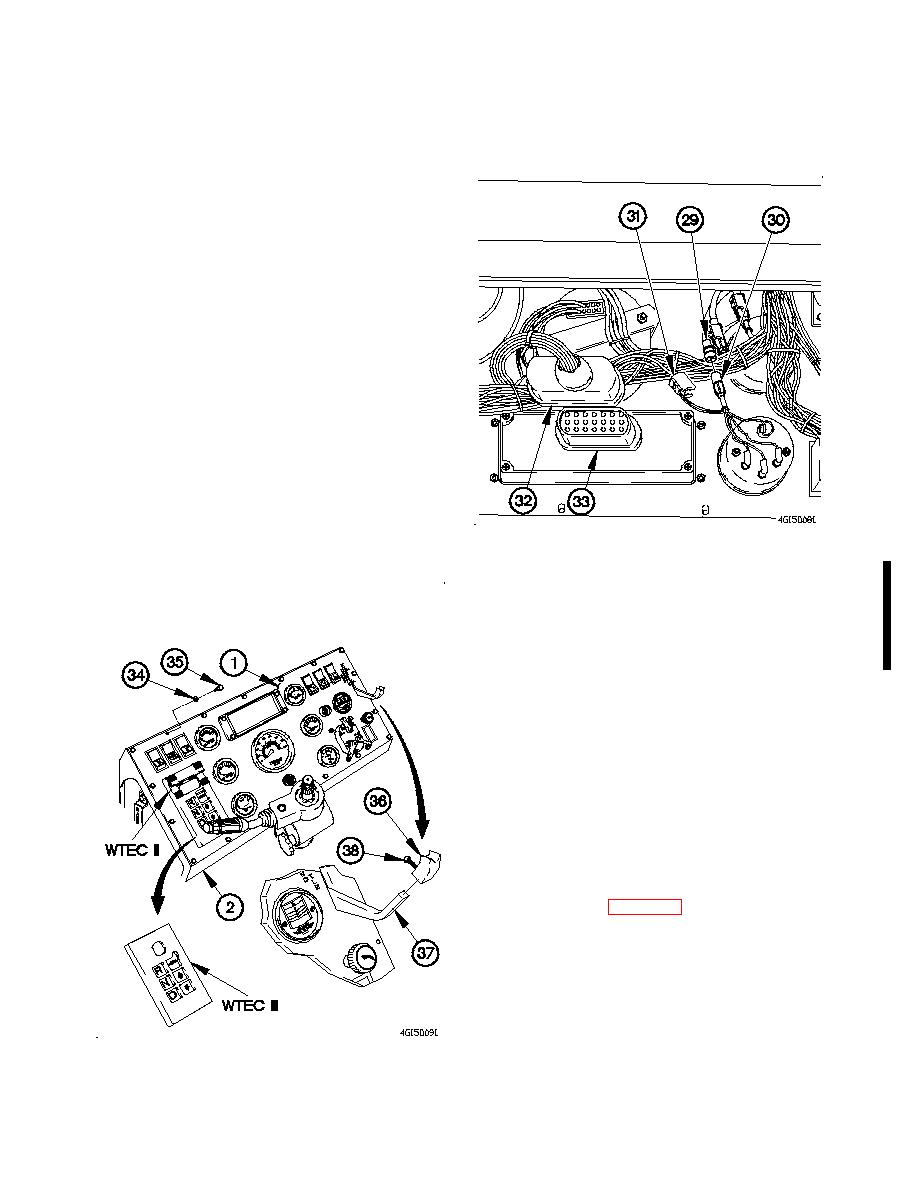
All electrical gages are connected the same
way. OIL PRESS gage shown. Refer to Table
7-1.2 Electrical Gages Connectors for correct
combinations of gages and connectors.
(16) Connect connector (29) to OIL PRESS gage
connector (30).
(17) Connect connector clamp (31) on OIL PRESS gage
connector (30).
(18) Perform steps (16) and (17) on remaining electrical
gages.
(19) Connect connector PX7 (32) to lighted indicator
display (33).
NOTE
Depending upon pre-conditioned items
removed; configuration of the instrument
panel can have from 12 to 16 screws.
Configuration with 6 screws shown.
(20) Position instrument panel assembly (1) on dashboard
(2) with 16 washers (34) and screws (35).
(21) Tighten 16 screws (35) to 24 lb-in. (3 Nm).
(22) Install HAND THROTTLE knob (36) on HAND
THROTTLE lever (37) with screw (38).
e. Follow-On Maintenance.
(1) Install steering wheel (para 13-2).
(2) Connect batteries (para 7-57).
(3) Start engine (TM 9-2320-366-10-1).
(4) Check operation of instrument panel assembly
switches and gages (TM 9-2320-366-10-1).
(5) Shut down engine (TM 9-2320-366-10-1).
End of Task.
Change 2
|
|
Privacy Statement - Press Release - Copyright Information. - Contact Us |