 |
|||
|
|
|||
|
|
|||
| ||||||||||
|
|
 TM 9-2320-211-34-2-2
NOTE
R e a d i n g s must be within limits given in table 13-2. The
letter L shows a loose fit. I f readings are not within
g i v e n limits, throw away part and get a new one.
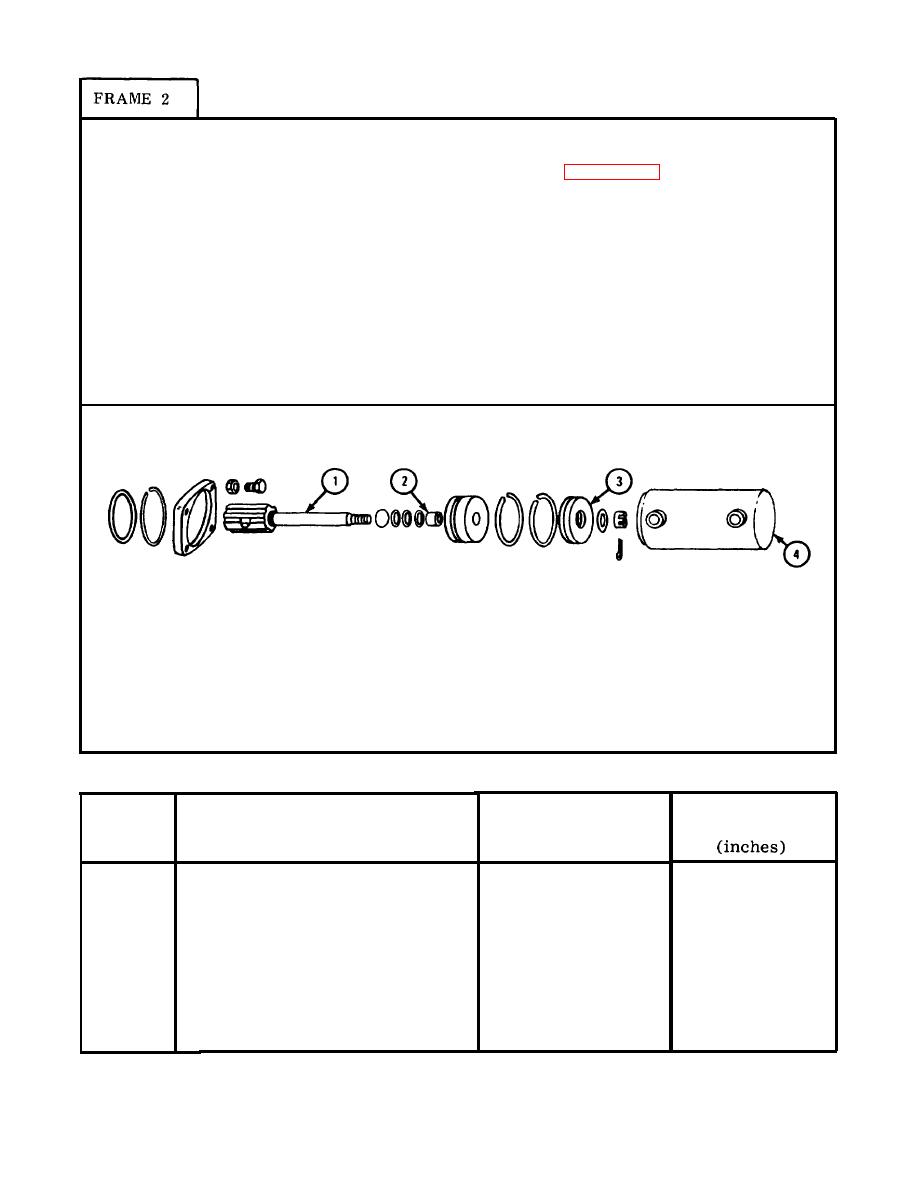
1.
Measure out side diameter of bar shaft (1).
2.
Measure i n s i d e d i a m e t e r o f b u s h i n g ( 2 ) .
Measure f i t o f b u s h i n g ( 2 ) o n s h a f t ( 1 ) .
3.
Measure o u t s i d e diameter of piston (3).
4.
Measure i n s i d e d i a m e t e r o f c y l i n d e r ( 4 ) .
5.
Measure f i t o f p i s t o n ( 3 ) i n c y l i n d e r ( 4 ) .
6.
NOTE: CHECK ONLY THOSE PARTS WHICH ARE
CALLED OUT IN THIS FRAME. PARTS
WITHOUT CALLOUTS ARE SHOWN ONLY
FOR REFERENCE PURPOSES OR ARE
CHECKED IN ANOTHER FRAME.
TA087294
Power Cylinder Wear Limits
Size and Fit
of New Parts
Wear Limits
Index
(inches)
Number
I t e m / P o i n t of Measurement
0 . 9 0 9 4 to 1.0000
None
S l i d i n g bar shaft diameter
1
None
1.0020 to 1.0040
B u s h i n g inside diameter
2
0 . 0 0 2 0 to 0.0046
None
F i t of bushing on shaft
2 and 1
3.8670 to 3.8690
None
P i s t o n outside diameter
3
C y l i n d e r inside diameter
3.8750 to 3.8770
4
None
0 . 0 0 6 L to 0.010L
None
F i t of piston in cylinder
3 and 4
|
|
Privacy Statement - Press Release - Copyright Information. - Contact Us |