 |
|||
|
|
|||
|
Page Title:
BACKUP LIGHT ASSEMBLY REPLACEMENT/REPAIR |
|
||
| ||||||||||
|
|
 TM 9-2320-366-20-3
This task covers:
a.
M1088 Backup
Light
Assembly
Removal
g. M1083/M1084/M1085/M1086/M1090/M1092/M10
b.
M1088 Backup
Light
Assembly
Installation
93/M1094/M1096 Backup Light Assembly
c.
M1089 Backup
Light
Assembly
Removal
Removal
d.
M1089 Backup
Light
Assembly
Installation
h. M1083/M1084/M1085/M1086/M1090/M1092/M10
e.
Deleted
93/M1094/M1096 Backup Light Assembly
f.
Deleted
Installation
i. Disassembly
j. Assembly
k. Follow-On Maintenance
INITIAL SETUP
Equipment Conditions
Materials/Parts
Batteries disconnected (para 7-57).
Lockwasher (2) (Item 96, Appendix G)
Lockwasher (4) (Item 114, Appendix G)
Packing, Preformed (Item 215, Appendix G)
Tools and Special Tools
Tool Kit, Genl Mech (Item 46, Appendix C)
Nut, Self-Locking (4) (Item 168, Appendix G)
Wrench, Torque, 0-175 lb-ft (Item 58, Appendix C)
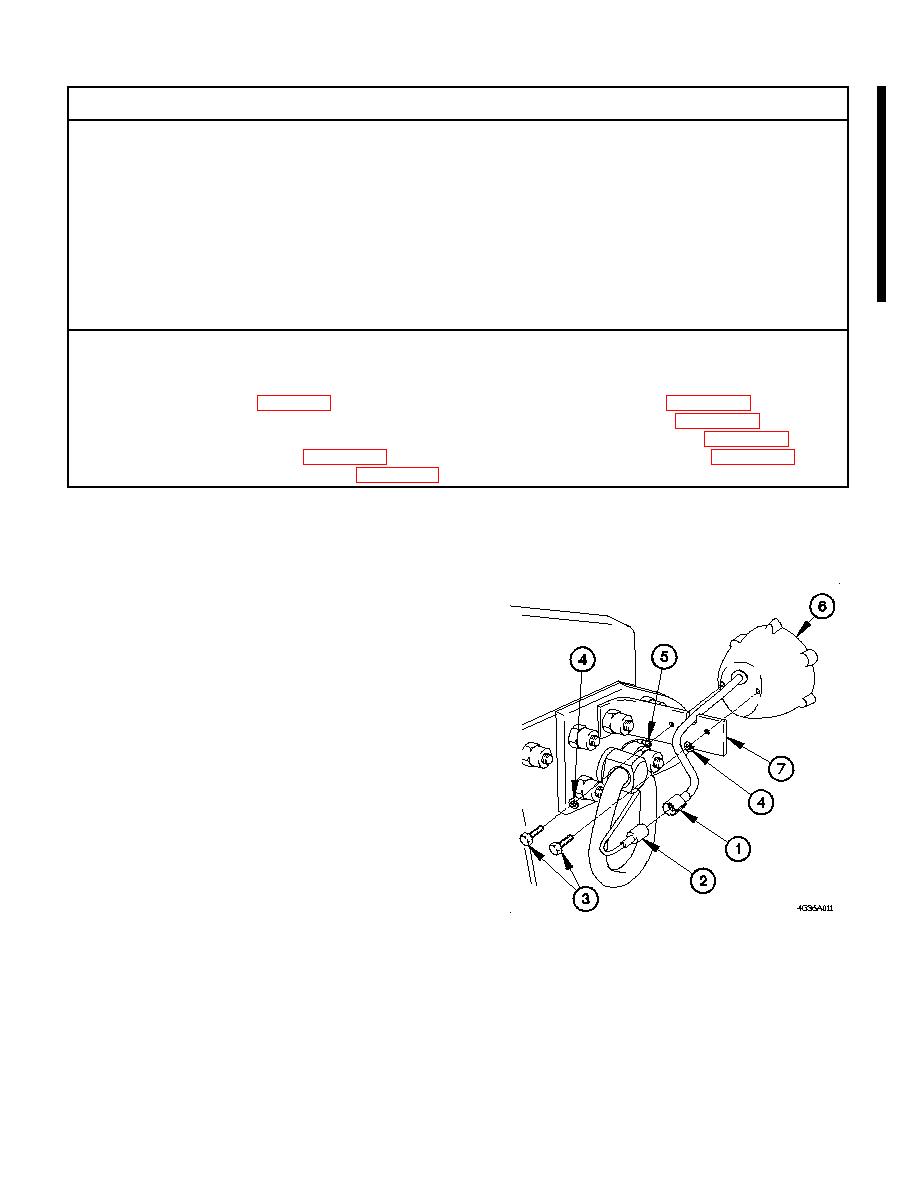
a. M1088 Backup Light Assembly Removal.
(1) Disconnect backup light connector (1) from connector
P87 (2).
(2) Remove two screws (3), lockwashers (4), terminal lug
TL17 (5), and backup light assembly (6) from bracket (7).
Discard lockwashers.
b. M1088 Backup Light Assembly Installation.
(1) Position terminal lug TL17 (5), two lockwashers (4),
screws (3), and backup light assembly (6) on bracket (7).
(2) Tighten two screws (3) to 19-24 lb-ft (26-32 Nm).
(3) Connect connector P87 (2) to backup light connector (1).
Change 1
|
|
Privacy Statement - Press Release - Copyright Information. - Contact Us |
