 |
|||
|
|
|||
|
Page Title:
RADIATOR OVERFLOW TANK AND BRACKET REPLACEMENT/REPAIR |
|
||
| ||||||||||
|
|
 TM 9-2320-366-20-3
This task covers:
a.
Radiator
Overflow
Tank
Removal
e. Radiator Overflow Tank Bracket Removal
b.
Radiator
Overflow
Tank
Disassembly
f. Radiator Overflow Tank Bracket Installation
c.
Radiator
Overflow
Tank
Assembly
g. Follow-On Maintenance
d.
Radiator
Overflow
Tank
Installation
INITIAL SETUP
Equipment Conditions
Tools and Special Tools (Cont)
Engine shut down (TM 9-2320-366-10-1).
Wrench, Torque, 0-200 lb-in. (Item 59,
Cab raised (TM 9-2320-366-10-1).
Tools and Special Tools
Materials/Parts
Pan, Drain (Item 24, Appendix C)
Antiseize Compound (Item 58, Appendix D)
Goggles, Industrial (Item 15, Appendix C)
Antifreeze, Ethylene Glycol, Permanent (Item
Tool Kit, Genl Mech (Item 46, Appendix C)
12, Appendix D)
Screwdriver Attachment, Socket Wrench (Item 48,
Nut, Self-Locking (2) (Item 167, Appendix G)
Nut, Self-Locking (3) (Item 156, Appendix G)
Socket Set, Socket Wrench (Item 36, Appendix C)
Nut, Self-Locking (Item 152, Appendix G)
Wrench, Torque, 0-175 lb-ft (Item 58, Appendix C)
WARNING
Coolant may be very hot and under pressure from engine operation. Ensure engine is
cool before performing maintenance. Failure to comply may result in injury to personnel.
a. Radiator Overflow Tank Removal.
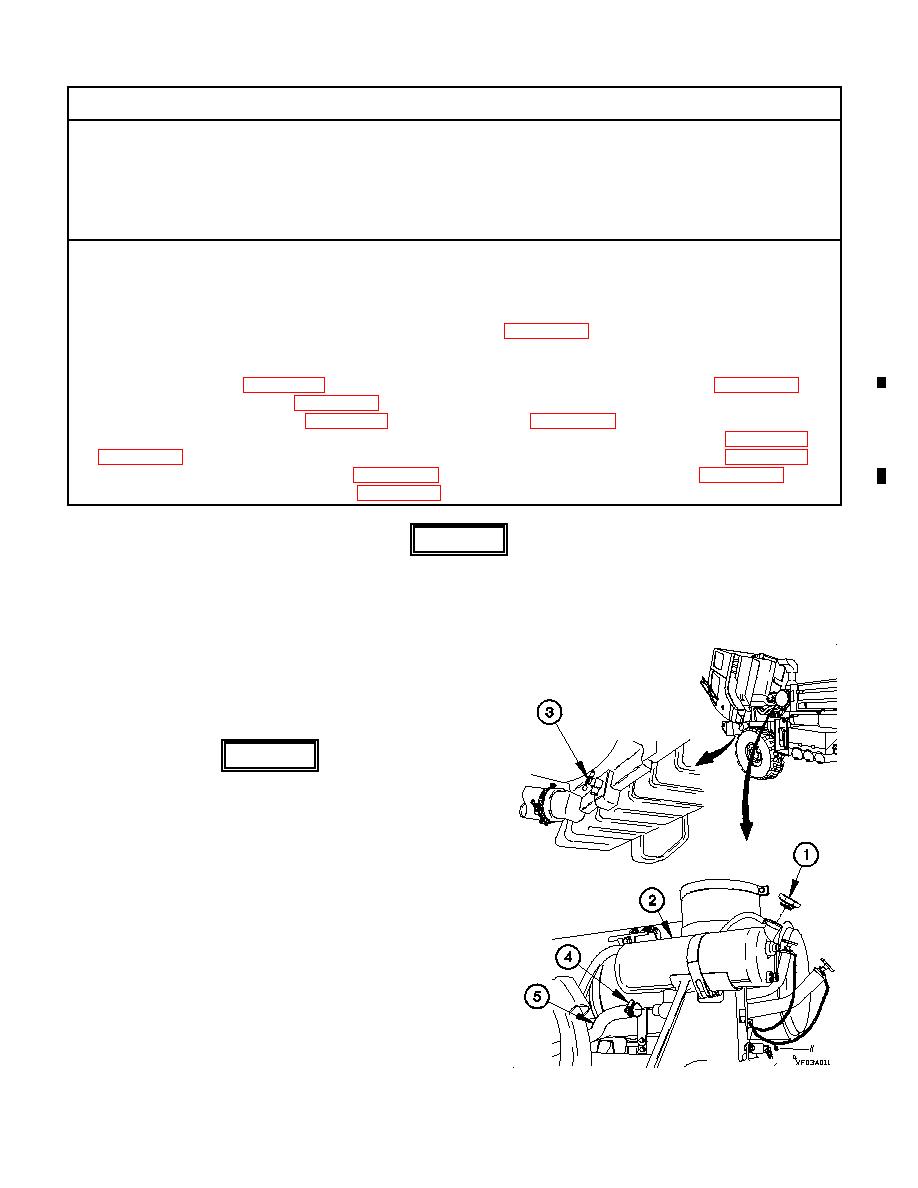
(1) Remove radiator cap (1) from radiator overflow tank (2).
(2) Position drain pan under radiator draincock (3).
WARNING
Wear appropriate eye protection when
working under vehicle due to the
possibility of falling debris. Failure to
comply may result in injury to personnel.
(3) Open radiator draincock (3) and drain approximately
three gallons (11 L) of coolant.
(4) Close radiator draincock (3).
(5) Loosen hose clamp (4) on lower coolant hose (5).
(6) Remove lower coolant hose (5) from radiator overflow
tank (2).
Change 1
|
|
Privacy Statement - Press Release - Copyright Information. - Contact Us |
