 |
|||
|
|
|||
|
|
|||
| ||||||||||
|
|
 TM 9-2815-210-34-2-2
FRAME
30
NOTE
R e a d i n g s must be within limits given in table 4-10. The
letter L shows a loose fit and the letter T shows a tight
f i t . If readings are not within given limits, throw away
part and get a new one.
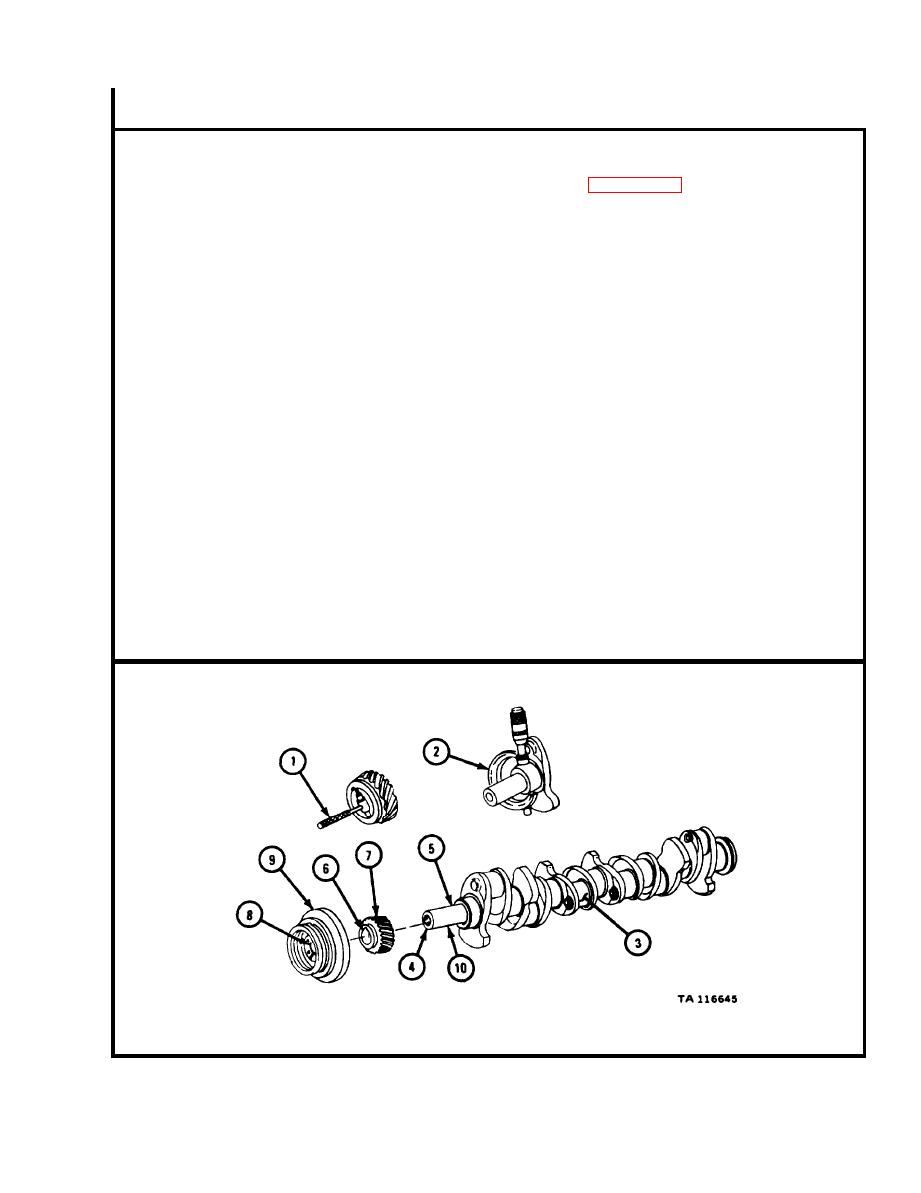
T h e r e are six main bearing journals on crankshaft. They
a r e called by numbers one to six, counting from front to
r e a r of crankshaft. T h e number four main bearing journal
( 3 ) is also called the main thrust bearing journal.
1.
u s i n g gage (internal measuring set) (1) and micrometer (2), measure
w i d t h of main thrust bearing journal (3).
2.
U s i n g outside micrometer (2), measure outside diameter of crankshaft pulley
e n d (4) near rear (5) of crankshaft pulley end.
U s i n g gage (1) and micrometer (2), measure inside diameter (6) of crankshaft
3.
gear (7).
4.
M e a s u r e fit of crankshaft gear (7) on rear (5) of crankshaft pulley end (4).
5.
U s i n g gage (1) and micrometer (2), measure diameter of bore (8) in crankshaft
d a m p e r and pulley (9).
6.
U s i n g micrometer (2), measure outside diameter of crankshaft pulley end (4)
a t front (10) of crankshaft pulley end.
7.
M e a s u r e fit of crankshaft damper and pulley (9) on front (10) of crankshaft
pulley end (4).
GO TO FRAME 31
4-47
|
|
Privacy Statement - Press Release - Copyright Information. - Contact Us |