 |
|||
|
|
|||
|
|
|||
| ||||||||||
|
|
 TM 9-2320-211-34-2-4
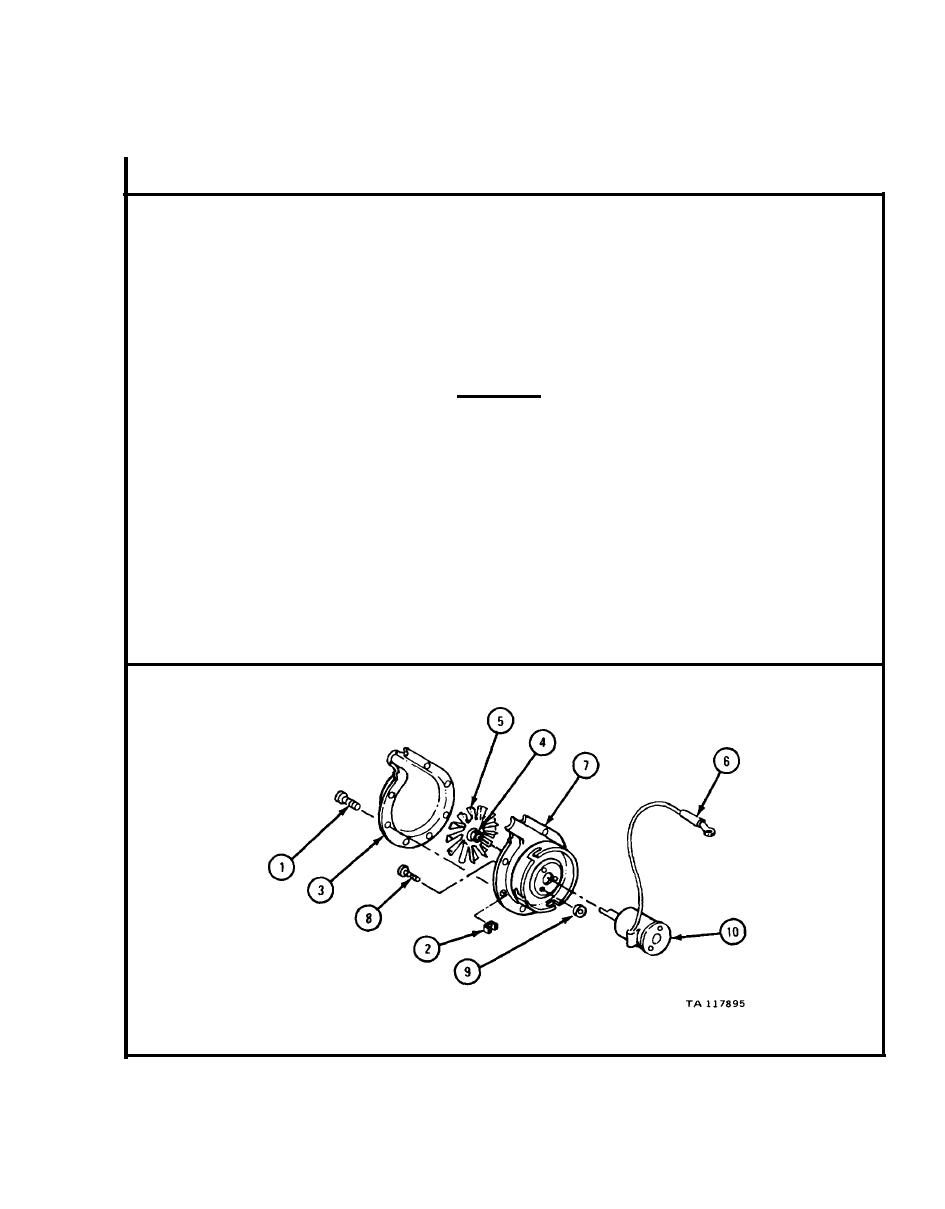
(2) Blower assembly.
FRAME 1
Unscrew and take out seven screws (1) and speed nuts (2). Lift off blower
1.
cover (3).
Loosen setscrew (4) in hub of blower wheel (5). Lift off blower wheel (5).
2.
C a r e f u l l y pull blower motor electrical lead (6) through grommeted hole in
3.
blower plate (7).
U n s c r e w and take out three screws (8). Lift off blower plate (7). Take off
4.
three spacers (9) from blower motor (10).
CAUTION
D o not dip blower motor in solvent. Bearings will be
d a m a g e d . D o not take blower motor apart. It cannot
be repaired.
W i p e blower motor (10) clean with cloth. I n s p e c t blower motor for broken
5.
h o u s i n g , bent shaft, o r s i g n s o f o v e r h e a t i n g . I n s p e c t electrical lead (6) for
b r o k e n or worn insulation.
G e t new motor if any of the conditions in step 5 are found. Get new motor if:
6.
a.
M o t o r was known not to be working.
H e a v y carbon was found on igniter or burner.
b.
C l e a n the rest of blower parts in dry cleaning solvent and wipe dry.
7.
GO TO FRAME 2
19-61
|
|
Privacy Statement - Press Release - Copyright Information. - Contact Us |