 |
|||
|
|
|||
|
Page Title:
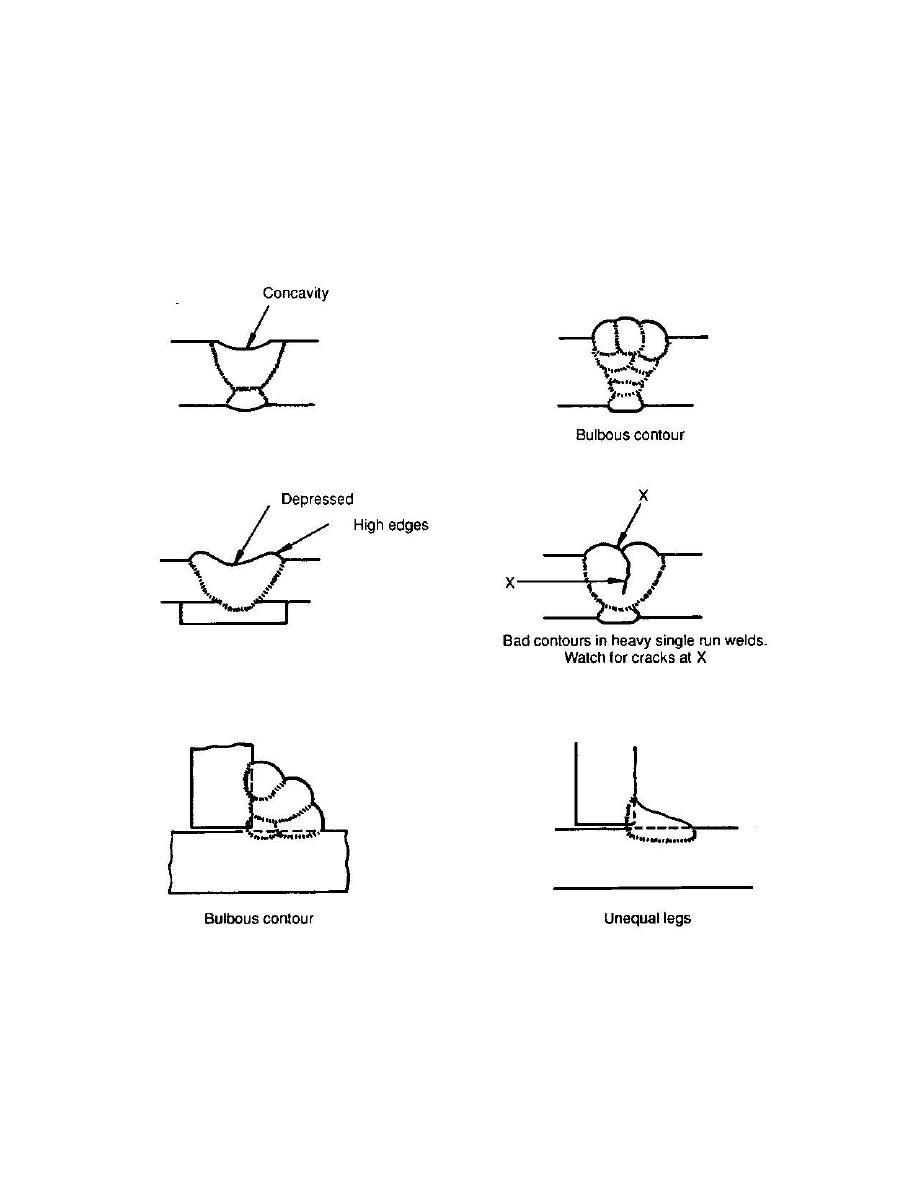
Figure 3-2 Contour defects (sheet 1) |
|
||
| ||||||||||
|
|
 TM 5-5420-279-23
(3)
Contour (fig. 3-2): Check that the contour of the weld face and the height of the
excess weld metal, if any, are in accordance with the acceptance criteria, using appropriate
measuring devices. Check that the surface of the weld is satisfactory.
NOTE
The contour is governed by the welding technique and the welding position.
Figure 3-2 Contour defects (sheet 1)
Figure 3-2 Contour defects (sheet 2)
(4)
Weld width (fig. 3-3): Check that the weld width is consistent over the whole of the
joint and that it satisfies the dimensional requirements given in the text and illustration,
using appropriate measuring devices. In the case of fillet welds, the weld width may not
have been given on the drawing and a calculation will be required to check that the leg
length(s) or throat thickness has been achieved.
Appendix K Page 12
|
|
Privacy Statement - Press Release - Copyright Information. - Contact Us |