 |
|||
|
|
|||
|
Page Title:
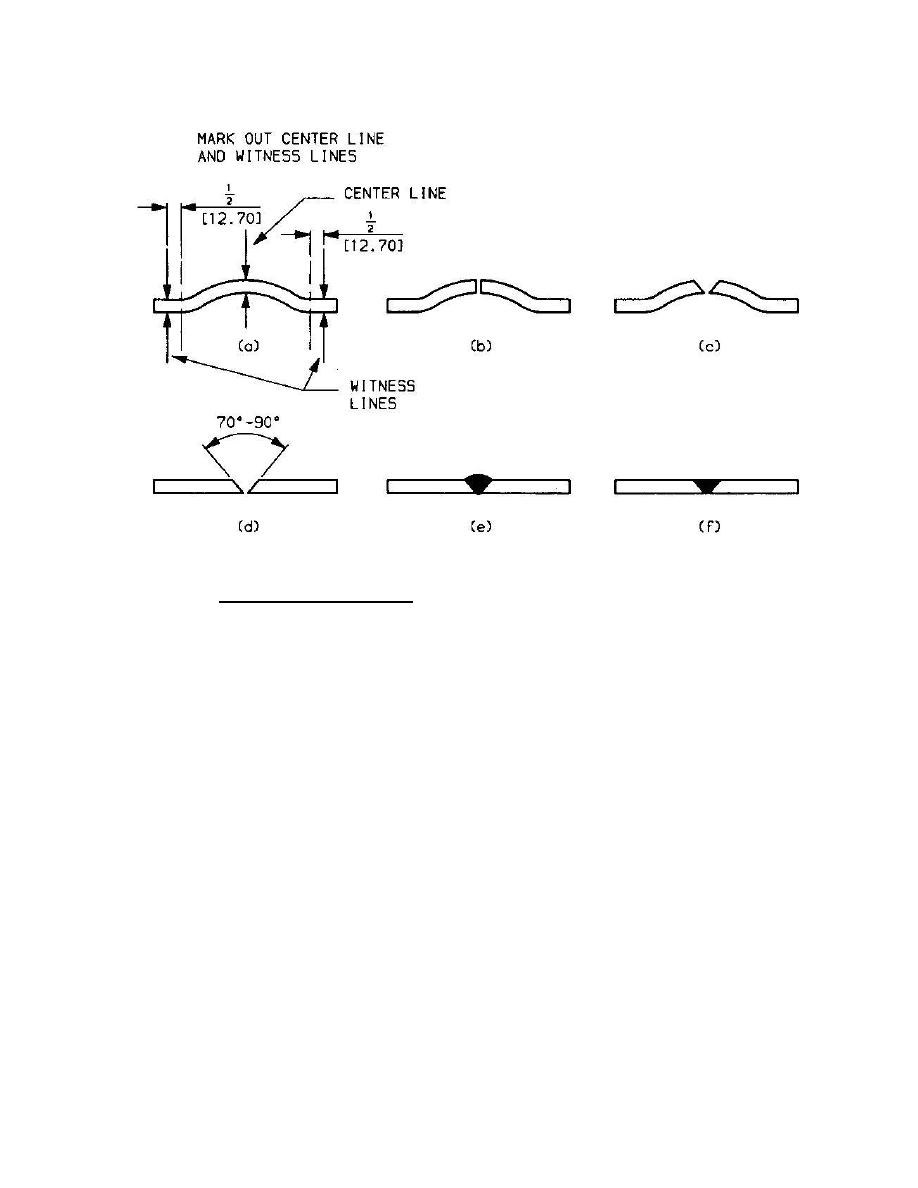
Figure 2-2 Repair steps for severely distorted plates |
|
||
| ||||||||||
|
|
 TM 5-5420-279-23
Figure 2-2 Repair steps for severely distorted plates
(1)
Preparation for Straightening
(a)
Clamp the relevant component onto a steel table.
(b)
Mark out position of the centerline through distorted area on both sides of the
plate.
(c)
Mark out witness lines 1/2 in (12.7 mm) past the extent of the distortion, on
both sides of the centerline and on both sides of the plate.
(d)
Cut through the centerline leaving a slot of sufficient width to enable
straightening of plate (fig.2-2(b)).
(e)
Hand grind weld preparation on cut, to achieve the included angle described
in the weld procedure (Sections 5 and 6) when the plate has been straightened (figs.
2-2(c) and (d)). Note should also be made of the required toe depth for each weld
configuration.
For steel components no heat treatment is required prior to straightening and the repair
procedure should be continued at paragraph (2). Straighten the plate.
CAUTION
For Aluminum components, if the temperature is raised above 470oC (878oF),
component must be scrapped. (The 450oC - 470oC (842 - 878oF) band is a safety
margin). This is specifically for Aluminum alloys.
Appendix K Page 8
|
|
Privacy Statement - Press Release - Copyright Information. - Contact Us |