 |
|||
|
|
|||
|
Page Title:
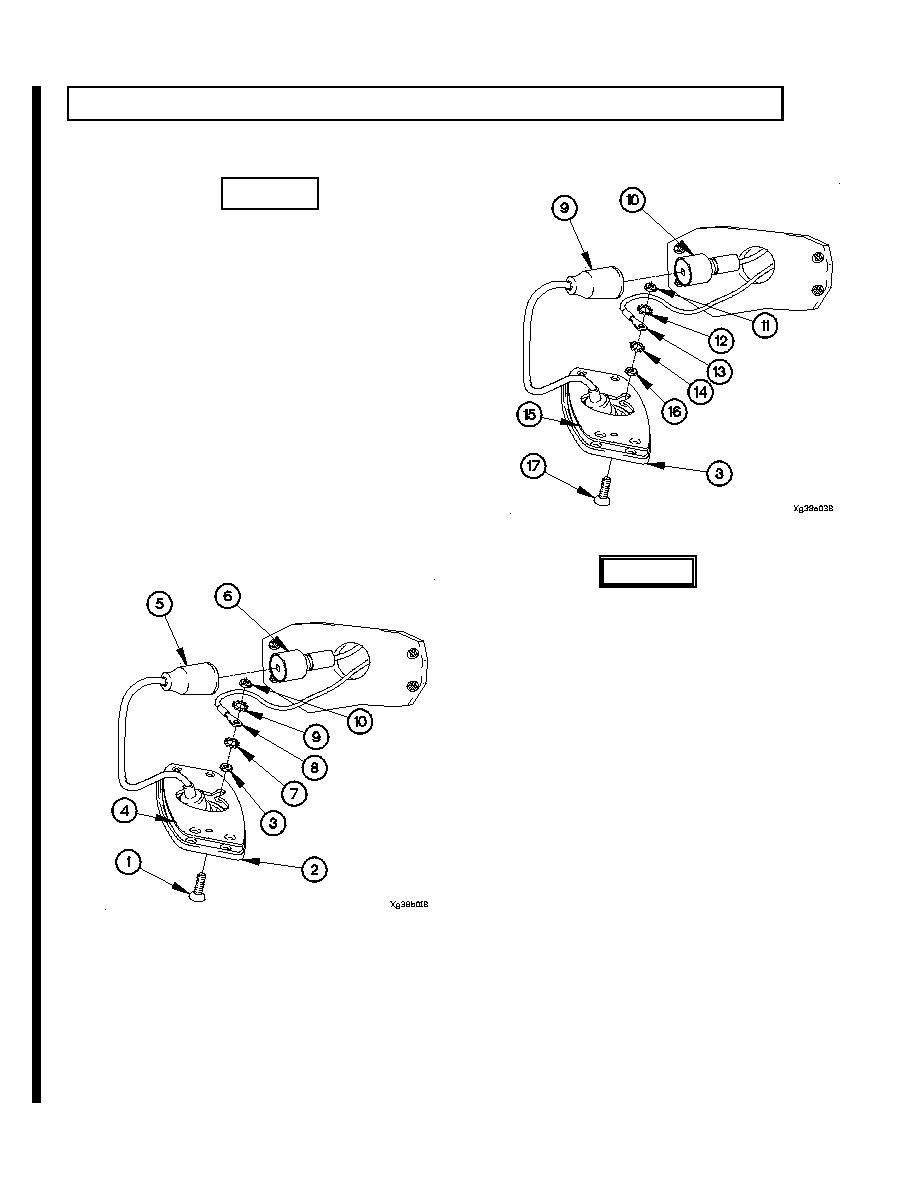
Cab Clearance and Marker Light Installation. |
|
||
| ||||||||||
|
|
 TM 9-2320-366-20-3
7-38. CLEARANCE AND MARKER LIGHT ASSEMBLIES REPLACEMENT (CONT)
CAUTION
Do not let wires slip through hole and into
cab structure. If wires slip into cab structure,
vehicle will need further disassembly to
retrieve wires.
(5) Disconnect marker light connector (9) from connector
P50 (10).
(6) Remove nut (11), lockwasher (12), terminal lug (13),
lockwasher (14), base (3), and gasket (15) from vehicle.
Discard lockwashers.
(7) Remove nut (16), and screw (17) from base (3).
b. Cab Clearance and Marker Light Installation.
WARNING
Adhesives, solvents, and sealing compounds
can burn easily, can give off harmful vapors,
and are harmful to skin and clothing. Keep
away from open fire and use in a well-
ventilated area. If adhesive, solvent, or
sealing compound gets on skin or clothing,
wash immediately with soap and water.
Failure to comply may result in injury to
personnel.
(1) Apply adhesive to threads of screw (1).
(2) Install screw (1) in base (2) with nut (3).
NOTE
Clearance and marker lights originally come
with cork gaskets. Discard cork gaskets and
replace with rubber gaskets PN 12421469.
(3) Install gasket (4) on base (2).
(4) Connect marker light connector (5) to connector P50 (6).
(5) Install lockwasher (7), terminal lug (8), lockwasher (9),
and nut (10) on back of base (2).
7-220
Change 1
|
|
Privacy Statement - Press Release - Copyright Information. - Contact Us |
