 |
|||
|
|
|||
|
|
|||
| ||||||||||
|
|
 TM 9-2320-366-20-3
NOTE
Perform step (10) if replacing alternator
P/N N1506-1 (12420852) with alternator
P/N N1509-1 (12422863).
Install plastic cable ties as required to
terminal lug TL110 and tie wire away from
alternator.
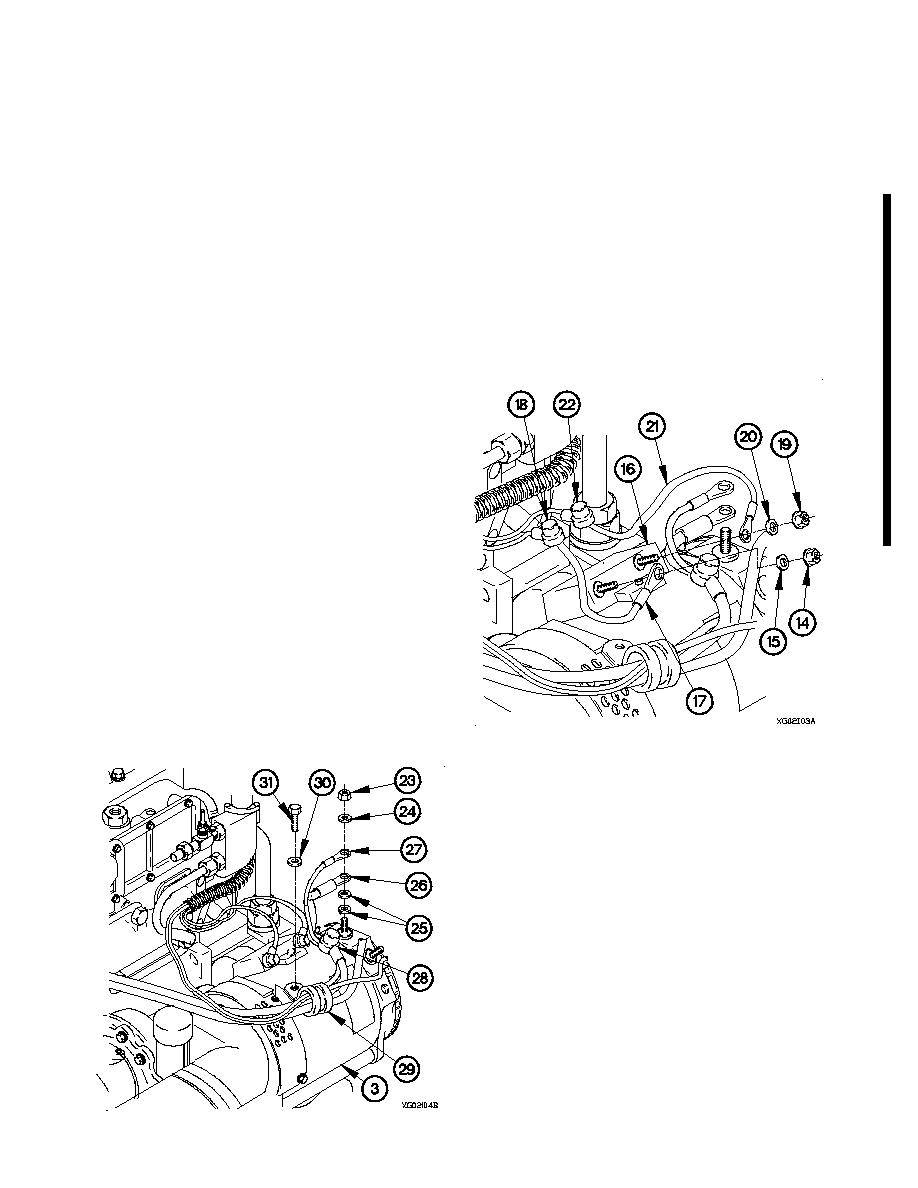
(10) Apply electrical tape to terminal lug TL110 (17).
NOTE
Perform steps (10.1) through (13) on alternator
P/N N1506-1 (12420852).
(10.1) Remove self-locking nut (14) and washer (15) from
voltage regulator (16).
(11) Position terminal lug TL110 (17), washer (15), and
self-locking nut (14) on voltage regulator (16).
(12) Tighten self-locking nut (14) to 20-lb-in. (3 Nm).
(13) Position dust boot (18) on terminal lug TL110 (17).
(14) Remove self-locking nut (19) and washer (20) from
voltage regulator (16).
(15) Position terminal lug TL35 (21), washer (20), and
self-locking nut (19) on voltage regulator (16).
(16) Tighten self-locking nut (19) to 25 lb-in. (3 Nm).
(17) Position dust boot (22) on terminal lug TL35 (21).
(18) Remove self-locking nut (23), washer (24), and two
washers (25) from alternator (3).
(19) Position two washers (25) terminal lugs TL6 (26) and
TL2 (27), washer (24), and self-locking nut (23) on
alternator (3).
(20) Tighten self-locking nut (23) to 80 lb-in. (9 Nm).
(21) Position dust boot (28) on terminal lug TL2 (27).
(22) Position clamp (29), washer (30), and screw (31) on
alternator (3).
(23) Tighten screw (31) to 80 lb-in. (9 Nm).
Change 2
|
|
Privacy Statement - Press Release - Copyright Information. - Contact Us |
