 |
|||
|
|
|||
|
|
|||
| ||||||||||
|
|
 TM 9-2320-366-20-1
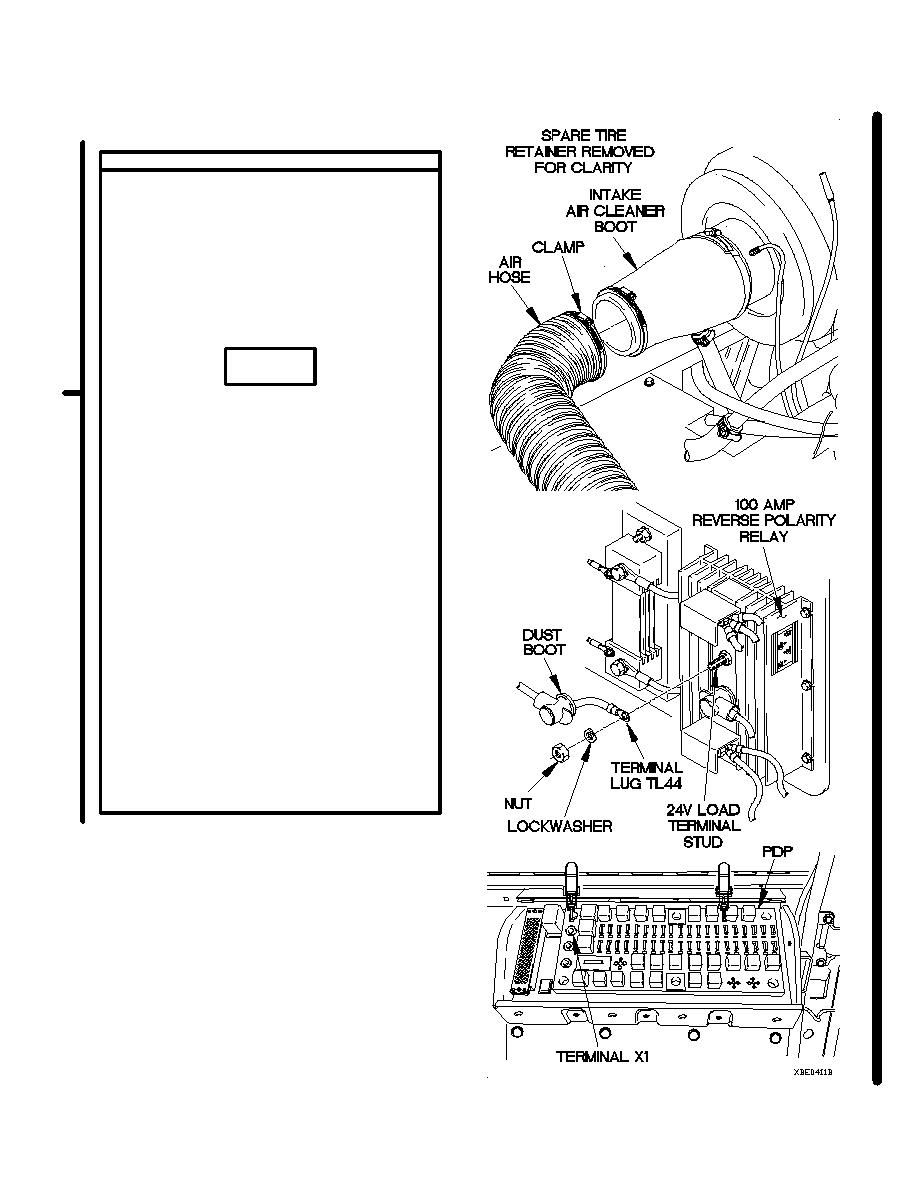
CONTINUITY TEST
(1) Lift dust boot on 24V LOAD terminal stud
on 100 AMP reverse polarity relay.
(2) Remove nut, lockwasher, and terminal lug
TL44 from 24V LOAD terminal stud on 100
AMP reverse polarity relay. Discard
lockwasher.
(3) Set multimeter to ohms.
(4) Connect positive (+) probe of multimeter
to terminal lug TL44.
CAUTION
When testing to terminal X1 on PDP, ensure
that multimeter probes come in contact with
the outside metal ring. Failure to comply
may result in false troubleshooting test
results.
(5) Connect negative (-) probe of multimeter to
terminal X1 on PDP and note reading on
multimeter.
(6) If continuity is not present, replace 100
AMP reverse polarity relay to PDP 24 VDC
cable (para 7-131).
(7) If continuity is present, replace 100 AMP
reverse polarity relay (para 7-30).
(8) Install PDP cover (para 16-2).
(9) Position terminal lug TL44 on 24V LOAD
terminal stud on 100 AMP reverse polarity
relay with lockwasher and nut.
(10) Tighten nut to 120-144 lb-in. (14-16 N.m).
(11) Position dust boot on 24V LOAD terminal
stud on 100 AMP reverse polarity relay.
(12) Position air hose on intake air cleaner boot
with clamp.
(13) Tighten clamp to 36-48 lb-in. (4-5 N.m).
(14) Connect batteries (para 7-57)
(15) Raise spare tire (TM 9-2320-365-10).
Change 1
2-284.7
|
|
Privacy Statement - Press Release - Copyright Information. - Contact Us |
