 |
|||
|
|
|||
|
Page Title:
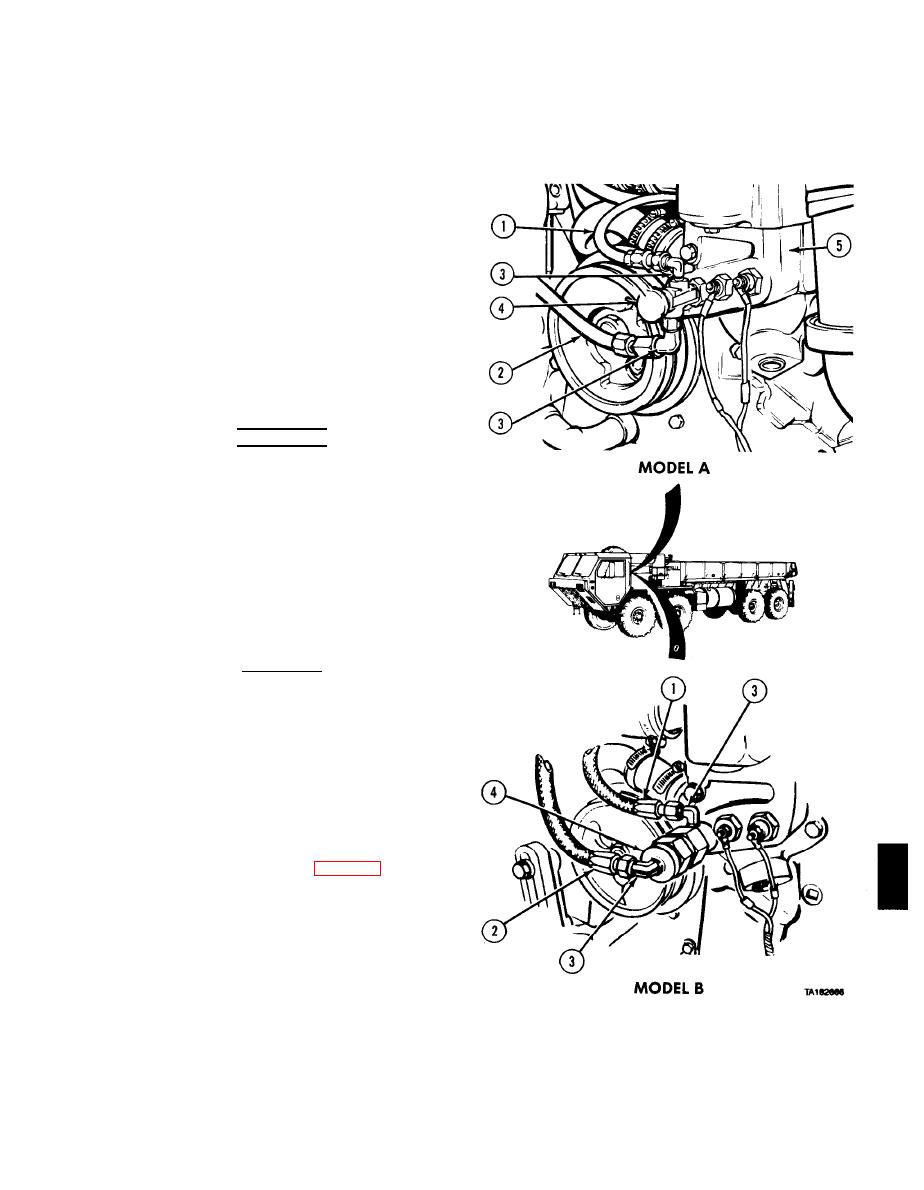
FAN CONTROL VALVE REMOVAL/INSTALLATION-continued |
|
||
| ||||||||||
|
|
 TM 9-2320-279-20-1
Cooling System Maintenance Instructions (Cont)
a. Removal.
NOTE
Vehicles may have old or new model
valves. Model A valve must be
replaced by Model B or Model A
valve.
ZModel B must be replaced by a
Model B valve.
ZTag and mark air lines before removal.
(1) Remove two air lines (1 and 2).
(2) Remove two elbows (3).
(3) Remove fan control valve (4) from
thermostat (5).
b.
Installation.
WARNING
Adhesives, solvents, and sealing
compounds can burn easily, can give off
harmful vapors, and are harmful to skin
and clothing. To avoid injury or death,
keep away from open fire and use in
well-ventilated area. If adhesive,
solvent, or sealing compound gets on
skin or clothing, wash immediately with
soap and water.
(1) Apply pipe thread sealing compound
to threads of fan control valve (4).
CAUTION
Do not tighten fan control valve by
placing wrench on housing or fan
control valve may be damaged.
(2) Install fan control valve (4) in
thermostat (5).
(3) Apply pipe thread sealing compound
to threads of elbows (3) and install
elbows.
(4) Connect two air lines (1 and 2).
c. Follow-on Maintenance.
(2) Close engine cover
(TM 9-2320-279-10).
(3) Start engine and build up air pressure
(TM 9-2320-279-10).
(4) Check operation of fan control valve
(TM 9-2320-279-10).
(5) Shut off engine (TM 9-2320-279-10).
END OF TASK
6-37
|
|
Privacy Statement - Press Release - Copyright Information. - Contact Us |
